
Theme Setup
General notes and suggestions for customizing So Simple Theme.
Note: You can find Aleh’s own tweaks below.
- Installation
- Running Jekyll
- Scaffolding
- Site Setup
- Adding New Content
- Layouts and Content
- Social Share Links
- Disqus Comments
- Twitter Cards
- Jekyll search
- MathJax
- Aleh’s Customizations
- Further Customization
- Questions?
- License
Installation
So Simple now requires Jekyll 3.0. Make sure to run bundle update if you aren’t on the latest version to update all gem dependencies.
If you are creating a new Jekyll site using So Simple follow these steps:
- Fork the So Simple repo.
- Clone the repo you just forked and rename it.
- Install Bundler
gem install bundlerand Runbundle installto install Jekyll and all dependencies. - Update
_config.yml, add navigation, and replace demo posts and pages with your own. Full details below.
If you want to use So Simple with an existing Jekyll site follow these steps:
- Download So Simple and unzip.
- Rename
so-simple-theme-masterto something meaningful ie:new-site - Run
bundle installto install Jekyll and all dependencies. - Remove demo posts/pages and replace with your own posts, pages, and any other content you want to move over.
- Update posts’ and pages’ YAML to match variables used by So Simple. Full details below.
- Update
_config.ymland add navigation links and additional author data if applicable. Full details below.
Pro-tip: Delete the gh-pages branch after cloning and start fresh by branching off master. There is a bunch of garbage in gh-pages used for the theme’s demo site that I’m guessing you won’t want.
Running Jekyll
The preferred method for running Jekyll is with bundle exec, but if you’re willing to deal gem conflicts feel free to go cowboy with a jekyll build or jekyll serve.
In some cases, running executables without bundle exec may work, if the executable happens to be installed in your system and does not pull in any gems that conflict with your bundle.
However, this is unreliable and is the source of considerable pain. Even if it looks like it works, it may not work in the future or on another machine.
bundle exec jekyll build

bundle exec jekyll serve
Scaffolding
How So Simple is organized and what the various files are. All posts, layouts, includes, stylesheets, assets, and whatever else is grouped nicely under the root folder. The compiled Jekyll site outputs to _site/.
modified-so-simple-theme/
├── _includes/
|    ├── browser-upgrade.html   # prompt to install a modern browser for < IE9
|    ├── disqus-comments.html   # Disqus comments script
|    ├── feed-footer.html       # post footers in feed
|    ├── footer.html            # site footer
|    ├── head.html              # site head
|    ├── navigation.html        # site top navigation
|    ├── open-graph.html        # meta data for Open Graph and Twitter cards
|    └── scripts.html           # site scripts
├── _layouts/
|    ├── compress.html          # format-less layout that compresses html
|    ├── page.html              # single column page layout (derives from compress layout)
|    ├── post.html              # single column post layout (derives from compress layout)
|    ├── collection.html        # layout for collection pages (derives from page layout)
|    └── home.html              # layout for home pages (derives from page layout)
├── docs/                       # documents folder (incl. posts, pages, collections, xmldata)
|    ├── _posts/                # markdown formatted posts
|    ├── pages                  # markdown formatted pages (e.g. about, search, tags, e.t.c.)
|    ├── collections            # markdown formatted collection pages
|    └── xmldata                # xml data to be loaded dynamically (e.g. via timelines)
├── _sass/                      # sass stylesheets
├── assets/
|    ├── css/                   # compiled stylesheets
|    ├── fonts/                 # webfonts
|    └── js/
|        ├── _main.js           # main JavaScript file, plugin settings, etc
|        ├── plugins/           # scripts and jQuery plugins to combine with _main.js
|        ├── scripts.min.js     # concatenated and minified _main.js + plugin scripts
|        └── vendor/            # vendor scripts to leave alone and load as is
├── images/                     # images for posts and pages
├── feed.xml                    # Atom feed template
├── index.md                    # sample homepage. lists 5 latest posts
Site Setup
A quick checklist of the files you’ll want to edit to get up and running.
Site Wide Configuration
_config.yml is your friend. Open it up and personalize it. Most variables are self explanatory but here’s an explanation of each if needed:
title
The title of your site… shocker!
Example title: My Awesome Site
logo
Your site’s logo, appears in the header below the navigation bar and is used as a default image for Twitter Cards when a feature is not defined. Place in the images folder.
url
Used to generate absolute URLs for sitemaps, feeds and for generating canonical URLs in a page’s <head>. When developing locally either comment this out or use something like http://localhost:4000 so all assets load properly. Don’t include a trailing /. Protocol-relative URLs are a nice option but there are a few caveats1.
Examples:
url: http://mmistakes.github.io/so-simple-theme
url: http://localhost:4000
url: http://mademistakes.com
url: //mademistakes.com
url:
Google Analytics and Webmaster Tools
Google Analytics UA and Webmaster Tool verification tags can be entered under owner in _config.yml. For more information on obtaining these meta tags check Google Webmaster Tools and Bing Webmaster Tools support.
Navigation Links
To set what links appear in the top navigation edit _data/navigation.yml. Use the following format to set the URL and title for as many links as you’d like. External links will open in a new window.
- title: Portfolio
  url: /portfolio/

- title: Made Mistakes
  url: http://mademistakes.com
Note: For Aleh’s modified navigation bar customizations see below.
Adding New Content
Posts are stored in the _posts directory and named according to the YEAR-MONTH-DAY-title.MARKUP format as per the usual.
To streamline the creation of posts and pages, Jekyll::Compose and Octopress are great plugins you can install to automate this process.
Layouts and Content
Explanations of the various _layouts included with the theme and when to use them.
Post and Page
These two layouts are very similar. Both have an author sidebar, allow for large feature images at the top, and optional Disqus comments. The only real difference is the post layout includes related posts at the end of the page.
Categories
In the sample posts folder you may have noticed categories: articles in the YAML front matter. Categories can be used to group posts into sub-folders. If you decide to rename or add categories you will need to create new category index pages.
For example. Say you want to group all your posts under blog/ instead of articles/. In your post add categories: blog to the YAML front matter, rename or duplicate articles/index.md to blog/index.md and update the for loop to limit posts to just the blog category.
{% for post in site.categories.blog %}If done correctly /blog/ should be a page index of only posts with a category of blog.
Feature Images
A good rule of thumb is to keep feature images nice and wide so you don’t push the body text too far down. An image cropped around around 1024 x 256 pixels will keep file size down with an acceptable resolution for most devices. If you want to serve these images responsively I’d suggest looking at the Jekyll Picture Tag plugin2.
The post and page layouts make the assumption that the feature images live in the images/ folder. To add a feature image to a post or page just include the filename in the front matter like so.
image:
  feature: feature-image-filename.jpg
  thumb: thumbnail-image.jpg #keep it square 200x200 px is good
To add attribution to a feature image use the following YAML front matter on posts or pages. Image credits appear directly below the feature image with a link back to the original source if supplied.
image:
  feature: feature-image-filename.jpg
  credit: Michael Rose #name of the person or site you want to credit
  creditlink: mademistakes.com #url to their site or licensing
Videos
Video embeds are responsive and scale with the width of the main content block with the help of FitVids.
Not sure if this only effects Kramdown or if it’s an issue with Markdown in general. But adding YouTube video embeds causes errors when building your Jekyll site. To fix add a space between the <iframe> tags and remove allowfullscreen. Example below:
<iframe width="560" height="315" src="http://www.youtube.com/embed/PWf4WUoMXwg" frameborder="0"> </iframe>
Link Post Type
So Simple Theme supports link posts, made famous by John Gruber. To activate just add link: http://url-you-want-linked to the post’s YAML front matter and you’re done. Here’s an example of a link post if you need a visual.
Author Override
By making use of data files you can assign different authors for each post.
Start by modifying authors.yml file in the _data folder and add your authors using the following format.
# Authors

billy_rick:
  name: Billy Rick
  web: http://thewhip.com
  email: billy@rick.com
  bio: "What do you want, jewels? I am a very extravagant man."
  avatar: bio-photo-2.jpg
  twitter: extravagantman
  google:
    plus: +BillyRick

cornelius_fiddlebone:
  name: Cornelius Fiddlebone
  email: cornelius@thewhip.com
  bio: "I ordered what?"
  avatar: bio-photo.jpg
  twitter: rhymeswithsackit
  google:
    plus: +CorneliusFiddlebone
To assign Billy Rick as an author for our post. We’d add the following YAML front matter to a post:
author: billy_rickSocial Share Links
To add Facebook, Twitter, and Google+ share links to a post add the following YAML front matter.
share: true
Share links appear below author details in the sidebar.
Disqus Comments
To enable comments signup for a Disqus account and create a shortname for your site. Then add it to your _config.yml under the site owner section like so:
site:
  owner:
    disqus-shortname: shortname
If you would like comments to appear on every post or page that uses the post.html layout simply add the following line to your _config.yml and you’re done.
comments: trueTo be more selective and granualar with which posts and pages Disqus comments appear on, add comments: true to the YAML Front Matter of each post or page instead.
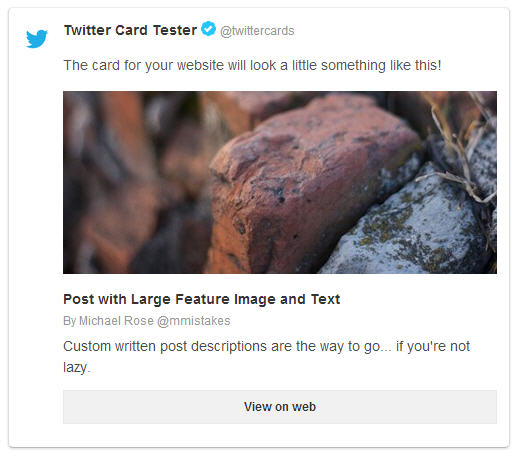
Twitter Cards
Feature and thumbnail images are used by Open Graph and Twitter Cards as well. If you don’t assign a thumbnail the site logo is used.
Here’s an example of a tweet with Twitter Cards enabled.
Jekyll search
This is a very basic attempt at indexing a Jekyll site and returning search results with JSON — Google quality results this is not.
To exclude posts/pages from search results add search_omit: true to their YAML Front Matter.
MathJax
MathJax is a simple way of including Tex/LaTex/MathML based mathematics in HTML webpages. To get up and running you need to include the MathJax script in the header of your github pages page, and then write some maths. For LaTex, there are two delimiters you need to know about, one for block or displayed mathematics \[ ... \], and the other for inline mathematics \( ... \).
Usage
To enable MathJax support be sure Kramdown is your Markdown flavor of choice and MathJax is set to true in your _config.yml file. Next to that, add mathjax: true to the YAML Front Matter of the page or post that the math is to be added.
markdown: kramdown
mathjax: true
Here is an example MathJax inline rendering \\( 1/x^{2} \\), and here is a block rendering:
\\[ \frac{1}{n^{2}} \\]
Here is an example MathJax inline rendering \( 1/x^{2} \), and here is a block rendering: \[ \frac{1}{n^{2}} \]
The only thing to look out for is the escaping of the backslash when using markdown, so the delimiters become \\[ ... \\] and \\( ... \\) for inline and block maths respectively.
Aleh’s Customizations
Disclaimer: Aleh is not a web designer, Michael instead, the creator of this theme is a great one. All credits and rights go to him. Aleh knows html, xml and json, bits of javascript, and is struggling hard with css. His only weapon is his experience in good software engineering practises. In order to not harass the original theme, Aleh tries to handle additions either in _extras.scss file or in their own .scss files. Alas, some of the modifications need to be done on the theme’s own .scss files. All modifications and additions implemented on top of the so-simple-theme merely serve the purposes of Aleh and the Micronaut. If you have remarks, comments, improvements or suggestions, you are more than welcome to contact Aleh via any of his social channels.
Navigation bar
So Simple Theme offers customization of the navigation bar through the _data/navigation.yml file. You are free to edit this navigation file according to your needs. This file offers your customizability over the menu entries.
Micronaut’s modified theme has substituted the original navigation bar design with a modern variant, which enables intuitive navigation throughout your site. The new navigation bar allows you to specify icons next to the title of each navigation entry (Font Awesome icons, or better known as -fa- icons). The icons can be set in _data/navigation.yml file. In the example below, fa-pencil and fa-music icons will be rendered in the navigation bar, right before the ‘Blog’ and ‘Music’ menu items respectively:
- title: Blog
  url: /blog/
  icon: pencil

- title: Music
  url: /music/
  icon: music
Last but not least, in case you need even more control on adapting the navigation bar, you may change the includes\navigation.html file according to your needs. For this, you might need some html knowledge and understanding of the css theme for the navigation bar.
Typography
Since I needed content in both English and Greek, we had to choose nice fonts that support both languages without jeopardizing the layout. I decided to adopt the GFS Artemisia fonts. GFS Artemisia is a relatively modern font, designed as a general purpose font in the same sense as Times is nowadays treated. The present version has been provided by the Greek Font Society and is under the terms of a free License. For the inital paragraph letters, I chose another font series named “Zallmancaps”. The webfonts are all available on the github repository, so as to decouple the dependencies with webfont platforms, such as google fonts or fonts squirrel. Last but not least, I make limited use of the ‘Philosopher’ webfonts (by google) mainly for the menus, buttons, some headers, and footer notes. As for blockquotes, the “Truetypewritter PolyglOTT” OpenType fonts is used.
Capital Letter in paragraphs
You can start a paragraph with a capital letter as in the example below. The capital letter shoud be nested inside a <span class="dcap">T</span> markup.
Lorem ipsum dolor sit amet, consectetuer adipiscing elit, sed diam nonummy nibh euismod tincidunt ut laoreet dolore magna aliquam erat volutpat. Ut wisi enim ad minim veniam, quis nostrud exerci tation ullamcorper suscipit lobortis nisl ut aliquip ex ea commodo consequat. Duis autem vel eum iriure dolor in hendrerit in vulputate velit esse molestie consequat, vel illum dolore eu feugiat nulla facilisis at vero eros et accumsan et iusto odio dignissim qui blandit praesent luptatum zzril delenit augue duis dolore te feugait nulla facilisi.
The Author’s bio-photo story
Aleh and the Micronaut are the only editors of this blog. Since we need a single column for the text, the bio-photo which shows the author’s avatar has been disabled. The author’s bio photo is displayed on the top of the post or page, in place of the site’s logo. If the author is not specified, the site-logo is displayed.
Furthermore, it is possible to completely disable the author’s bio photo or site-logo on a certain post via the following YAML Front-Matter extension:
---
hidelogo: true
---
It would be great though, if the original theme had a configuration point for single, double column support. The truth is that we do need support for double columns, for displaying relative or suggested posts rather than displaying bio-photos.
The Timeline
A timeline can be declared either inside an html page or a markdown page/post. The timelines is declared within a <div id="timeline">...</div> section. The left-right alignment needs to be done manually, via the <div class="timeline-content right">. Timeline icon should be 110x110px, otherwise does not render in the center; if you have a tip to fix that I would be happy. Credits for the timeline styles go to Bruno Rodrigues’ responsive-timeline. Check here for an example; check also how this timeline unfolds as you scroll down.
Example:
<div id="timeline">

   <!-- First item - left aligned -->
  <div class="timeline-item">
  <div class="timeline-icon"><img src="/images/timeline/micronaut-white-transparent.png" alt=""></div>
    <div class="timeline-content">
        <h2>Left aligned item</h2>
        <h3>optional h3</h3>
        <p id="tags">optional · tag1</p>
        <p>Add your text here. You may include as many paragraphs, images, iframes as you like.</p>
    </div>
  </div>

  <!-- Second item - right aligned -->
  <div class="timeline-item">
    <div class="timeline-icon"><img src="/images/timeline/micronaut-white-transparent.png" alt=""></div>
    <div class="timeline-content right">
      <h2>Right aligned item</h2>
      <h3>Optional h3</h3>
      <p id="tags">optional · tag2</p>
      <p>Add your text here. You may include as many paragraphs, images, iframes as you like.</p>
    </div>
  </div>

</div>
This html code should render into something like:
Left aligned item
optional h3
Add your text here. You may include as many paragraphs, images, iframes as you like.
Right aligned item
Optional h3
Add your text here. You may include as many paragraphs, images, iframes as you like.
XML data loading and rendering
It is possible to load and render data via XML files that are located on the same repository as your blog or site. I believe the same design should work for remote XML data as well (let me know if you have tried this option).
For the XML data to be accessed and rendered, the location of the XML data file and its html rendering template need to be specified in the YAML front-matter section of your page.
The XML data file can be placed anywhere in the folder hierarchy of your repository.
The template describes (in html language) how the XML data should be rendered on a certain page; multiple rendering templates can all be specified in file: _includes\templates\xmltemplates.xml. Each template should be declared as a separate script with a unique identified (template id). The template needs to be defined within raw ... endraw Liquid tags (as in the example), in order to be properly parsed by Liquid. Without specifying a template, it is impossible to render the XML data even when it is successfully loaded.
Here is an example of a YAML front-matter:
---
 xmldata:
  data: /docs/xmldata/albums/albums2016.xml
  template: timelinetemplate
---
where, data is the local path for the xml data and template is the id of the template (defined in file: _includes\templates\xmltemplates.xml).
See a live demo of this feature. In this demo, the XML data is rendered as timeline items.
Since I haven’t tested this feature for other templates other than my own, I would be very delighted to receive your suggestions for improvements.
Central and inline quotes
This is the official rendering of a blockquote by the so-simple theme:
“ This is a blockquote ”
Aleh
Note that one has to manually add the quotation characters. There is a reasoning behind this, and I assume this is because of the cite mess (should be outside the quotations). The current implementation is satisfactory and thus no modifications are done for blockquotes. Next to the blockquotes, this modified theme supports the central-quote element which can be used as following:
<div class="central-quote">You should see two dividers on top and the bottom of this central-quote.</div>
Moreover, you may use inline quotes as following:
This quote is an <span class="inline-quote">inline quote</span>, and thus should be displayed inline with the paragraph.
which renders into something like:
This quote is an inline quote, and thus should be displayed inline with the paragraph.
Text divider
You can divide pieces of text by means of the text divider. The following html syntax can be used within markdown, similar to the central quote and other html markups:
<div class="text-divider"></div>
Recommended Posts
Jekyll’s related posts mechanism is not convenient. Ale decided himself to choose what the recommended posts would be, when and if necessary. To display a list of recommended posts, you have to add the following entry in the YAML front matter (beware of the spaces and all…) :
 relatedposts:
 - url: link-1-to-your-internal-post, e.g. : /blog/vitae/when-the-child-was-a-child/
 - url: link-2-to-your-internal-post
In this way, a list of recommended posts will appear at the bottom of your post. The recommended posts are applicable for posts only, not for pages.
Images & Figcaptions
There is a lot to be said about images and figcaptions, but better have a look around this site to see how images and figcaptions are rendered compared to the original theme.
Instafeed.js
We have successfully integrated instafeed.js to fetch images from Instagram. We are working towards a nice YAML front-matter API in which the script can easily be used in the posts.
Alternative list of posts
This modified theme supports an alternative layout for displaying post lists. Here is a live demo. At the moment of writing, this feature is under development.
Chat via Tawkto
It is possible to enable a chat plugin on certain posts or pages. Tawkto is used here as a messaging app. By default, the chat plugin is disabled in all posts. In order to enable it, the following yaml entry needs to be added in the front-matter section of the post or page for which you need the plugin:
---
enable_chat: true
---
Needless to say that in order to use the plugin, you need to specify your Tawkto siteID in the _config.yml file; the latter implies that you need a Tawkto account (which, by the way is free of charge).
Further Customization
Jekyll 2.x added support for Sass files making it much easier to modify a theme’s fonts and colors. By editing values found in _sass/_variables.scss you can fine tune the site’s colors and typography.
For example if you wanted a red background instead of white you’d change $body-color: #ebebeb; to $body-color: $cc0033;.
To modify the site’s JavaScript files I setup a Grunt build script to lint/concatenate/minify all scripts into scripts.min.js. Install Node.js, then install Grunt, and then finally install the dependencies for the theme contained in package.json:
npm install
From the theme’s root, run grunt to concatenate JavaScript files, and optimize all .jpg, .png, and .svg files in the images/ folder. You can also use grunt dev in combination with jekyll build --watch to watch for updates JS files that Grunt will then automatically re-build as you write your code which will in turn auto-generate your Jekyll site when developing locally.
Questions?
Found a bug or aren’t quite sure how something works? By all means Ping me on Twitter @mmistakes or file a GitHub Issue. And if you make something cool with this theme feel free to let me know.
License
This theme is free and open source software, distributed under the MIT License. So feel free to use this Jekyll theme on your site without linking back to me or including a disclaimer.
-
If you decide to use a protocol-relative URL know that it will most likely break sitemap.xml that the Jekyll-Sitemap gem creates. If a valid sitemap matters to you I’d suggest creating your own sitemap.xml and apply some Liquid logic to prepend links to posts/pages with
https:. ↩ -
If you’re using GitHub Pages to host your site be aware that plugins are disabled. You’ll need to build your site locally and then manually deploy if you want to use this sweet plugin. ↩